If you want to change an existing search mask, choose it from the selection list of the search.
As a user, you can set up and use personal search masks and also save them as a template.
Step by step:
|
Hide/display fields |
Use the recycling bin symbol to hide or show fields. Hidden fields have a darkened background. |
|
Move fields |
You can move the order of the fields in the search mask with drag & drop. |
|
Specify fixed search values |
Enter recurring search values in the desired field. They will be called up automatically with the search mask. Example: the “North” entry in the “Region” field |
|
Cancel/apply |
You can save your new search mask with the check mark symbol. To cancel your configuration, use the x symbol. |
The Subject and Type fields of a search mask are mandatory fields. They cannot be hidden or moved.
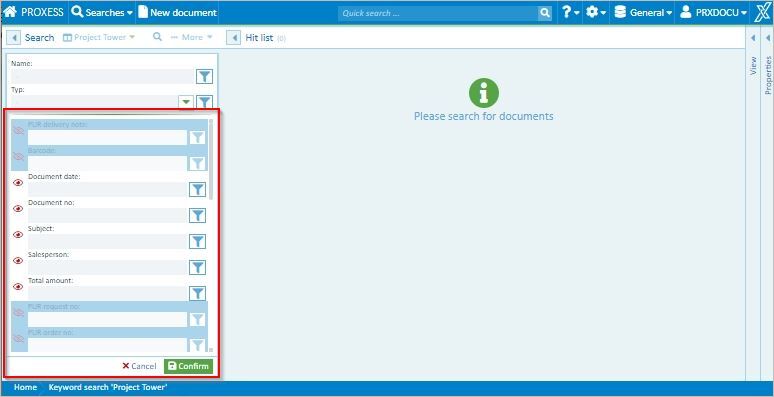
Fig.: Configuration of a personal search mask in the keyword search
Tip
|
|
As an administrator, you can also save the created searches as a template for PROXESS user groups. You can select the desired user group in the save dialog.
|
Administrators can create search masks for selected user groups: