The write cache describes a hard drive in the Storage Manager server on which volumes have been collected for burning.
Open the properties dialog using the context menu of the write cache:
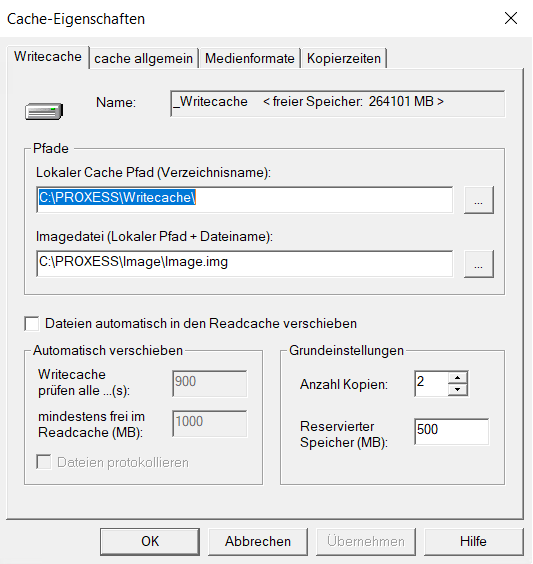
Figure: Cache Properties/Write Cache dialog
|
Write Cache tab |
|
||
|
Name |
In the Name field, you can see the free memory. |
||
|
Paths |
Paths option group:
|
||
|
Automatically move files to the read cache |
If this field is checked, the Move automatically option field opens. There, you can set how often the write cache is to be checked for data to be moved and the minimum number of MB which have to be free in the read cache. Another check gives you the option to log files in the current SM log file as well. You specify the SM log path under Tools/Log settings on the "File" tab. |
||
|
Basic settings |
|
||
|
Number of copies |
In this field, you can see the number of copies of a volume to be created when burning to CD/DVD. The minimum entry here is 2. |
||
|
Reserved memory (MB) |
In this field, you enter the minimum size of the hard disk memory to be reserved on the hard disk of the local computer. |
See also:
