In this area you can determine which fields are used to index the documents.
Then you can use the Field properties command to determine additional properties of individual fields for the selected scan profile.
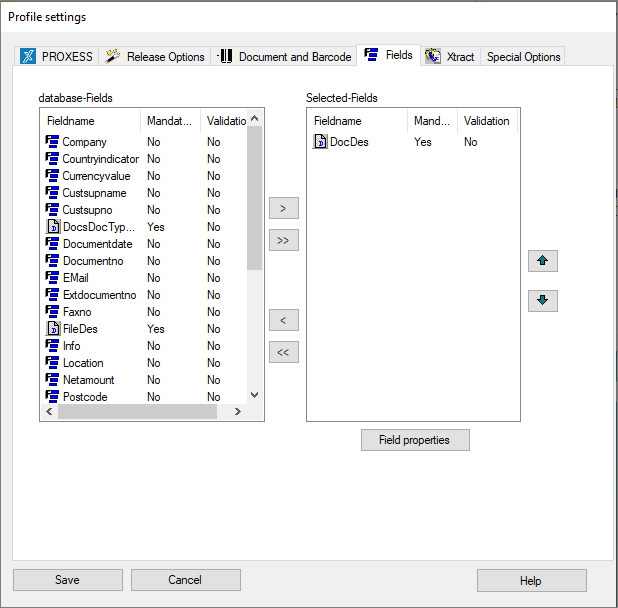
Figure: PROXESS Scan Client profile settings, “Fields” tab for the scan profile “WF_CostAccounting”
All fields of the database selected in the PROXESS tab are listed in the left area of the window under Database fields. You can transfer the fields for indexing required for this profile to the right window and thus make it available to the scan profile. If no fields are adopted for the profile, only the PROXESS core fields (document name, document type) for subsequent indexing are shown.
Explanations regarding the PROXESS core fields:
The document name (field name = DocDes) must always be filled and configured as a mandatory field. For that reason, it is already displayed to the right in the list of selected fields.
The document type (field name = DocsDocTypeName) does not have to be selected. If the document type is not selected, the document type selected under the PROXESS tab is entered by default. If the document type is selected for indexing, another document type that deviates from this can be selected during the indexing process. This makes sense if the document type may change within a scan batch.
The file name (field name = FileDes) also does not have to be selected. In this case, the recognized barcode number is entered as the file name by default. If no barcode number is recognized, the file name is used as the description by default.
However, the “file name” field can also be selected for indexing (i.e. dragged into the right column) and filled with an arbitrary value that deviates from this.
The individual field settings can be defined via the Field properties command and refer to the selected field. The button becomes active as soon as you have highlighted a field in the right window.
|
Database fields
|
In the left window, all index fields of the database are listed that you previously selected in the “PROXESS” tab. |
||
|
Selected fields and PROXESS mandatory fields |
This shows all index fields that you have selected for this profile. |
||
|
Field name
|
Name of the index field in the PROXESS archive database |
||
|
Mandatory
|
Indicates whether the field in PROXESS is a mandatory field or not.
|
||
|
Validation
|
The Validation column shows whether a PROXESS validation rule is allocated to this index field. If the field entry doesn’t fulfill the specified rule, the entry is invalid. The validation rule is stored in the PROXESS Administrator Console program. |
||
|
|
Indicator for a core field in PROXESS |
||
|
|
Indicator for a normal field. If the field is simultaneously a mandatory field in PROXESS, the symbol is red. |
||
|
|
With this button, you can select highlighted fields in this profile. |
||
|
|
Selected fields can be removed from the profile again with this button. |
||
|
|
All fields are removed from the left window and the scan profile again. |
||
|
|
All fields are deselected with this button. |
||
|
|
This moves the highlighted field up in the order of fields that will be displayed later in the indexing mask. |
||
|
|
This moves the highlighted field down in the order of fields. |
||
|
Field properties
|
With this command, you access another dialog in which the highlighted field acquires further field properties, which then only apply to this field and the active scan profile. |
||
|
Save |
With Save, the applied settings are adopted in the current profile. If the button is inactive, the settings are incomplete. For example, no settings have been applied in the “Xtract” tab yet. If you want to work without Xtract, just activate the option Without Xtract.
|
||
|
Cancel |
Use Cancel to close the window without saving your entries/changes. |
||
|
Help |
With Help, you can open the online help. |
Also see:
Online documentation for PROXESS Administrator