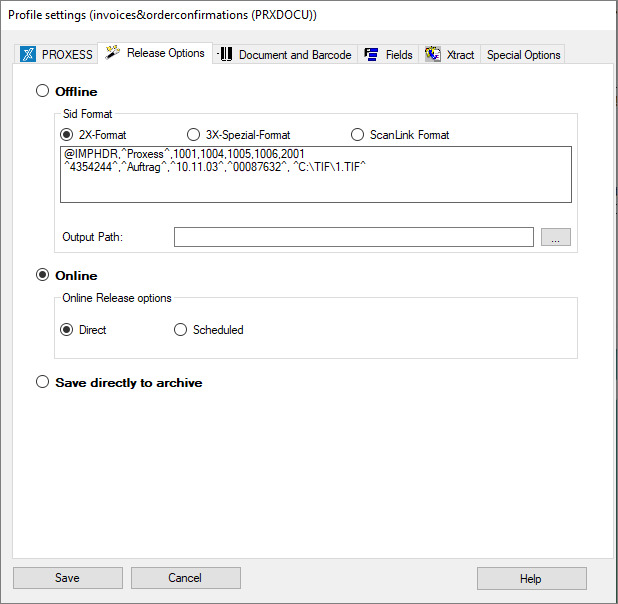
Here the settings for the type of transfer of scanned documents to the PROXESS archive are applied. The scanned documents can be transferred offline, online or directly.
Figure: PROXESS Scan Client profile settings, “Transfer” tab
The following transfer settings are available for you:
|
Offline |
Offline transfer involves creating a transfer file. This is stored in the entered output path together with the scanned files. The Offline option cannot be stored without specifying an output path. It is possible to use Windows variables when entering the path for the output path.
Offline transfer is expedient e.g. when the scanning PC is at a branch and not continuously connected to the PROXESS server. |
||
|
Online
Direct transfer
Scheduled transfer at
|
With an online transfer, you can choose between Direct transfer and a time-controlled transfer (Scheduled transfer at:)
The direct transfer is initiated with the Archive command in the “Transfer” processing step. Then the documents are archived/transferred.
The time-controlled, scheduled transfer is initiated with the Release command in the “Transfer” processing step. These released jobs also have to be released for archiving again in the menu window Released jobs.
Also see: Released jobs
|
||
|
Save directly to archive |
When this option is activated, the documents are immediately archived without manual release in the “Transfer” processing step. This is only possible (without indexing) if the option Bind by barcode is activated in the Document and barcode tab and a barcode is applied on the first page of the scanned document.
|
||
|
Save |
With Save, the applied settings are adopted in the current profile. If the button is inactive, the settings are still incomplete. (For example, no settings have been applied in the “Xtract” tab yet. If you want to work without PROXESS Xtract, just activate the option Without Xtract here). |
||
|
Cancel |
Use Cancel to close the window without saving your entries/changes. |
||
|
Help |
With Help, you can open the online help. |
Also see:
